|
General Dishwasher Tips
We often get calls and questions asking how people can ensure their dishwashers clean their dishes completely. While modern dishwashers provide incredible cleaning for very little water we recommend a key things to ensure an effective clean.
The video below provides some tips for on dish-washing by Finish the detergent makers:
0 Comments
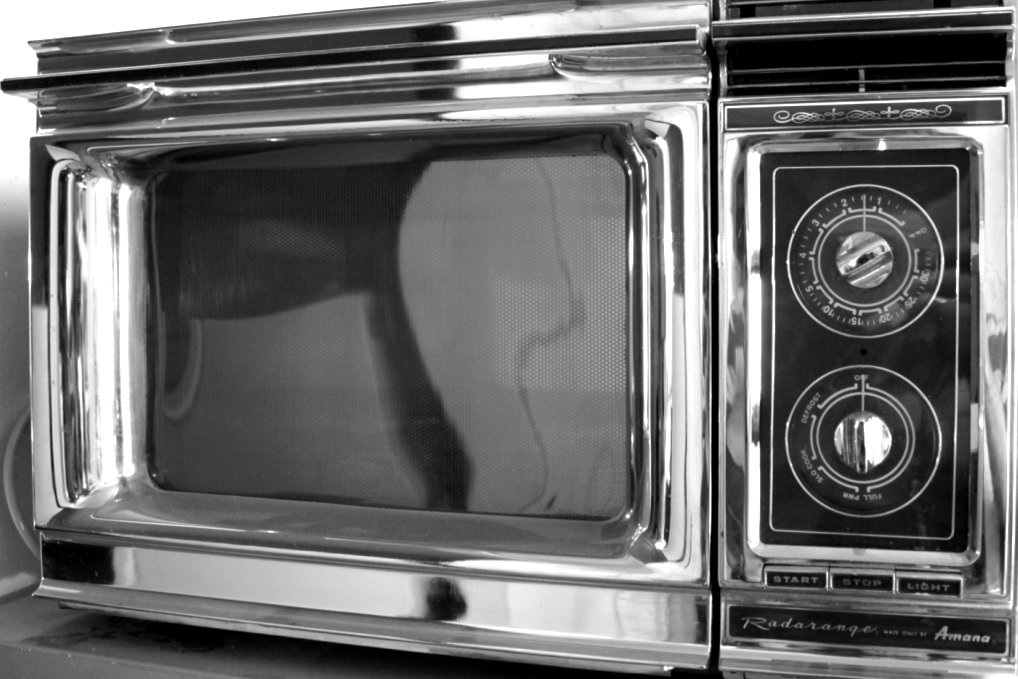 At Appliance Force, one of the most common questions techs get asked while fixing an appliance is if we have any tips on cleaning appliances. In the past we’ve written a few articles including oven self cleaning, how to fix stinky front load washers and more. However one of the most common questions is how to clean the inside of a microwave. Not only is it nice to clean the microwave but every month we get a call or two about something that had something burn on and damage a microwave so this an important issue to avoid costly Appliance Repair. Due to its convenient and versatile ability to heat food we often throw all kinds of things in the microwave for a few seconds. It’s easy to pop a slice of last night’s pizza but over time bits of food or liquids can dry to the sides and can be very difficult to remove without the proper steps. In fact, because food can bake on so hard customers sometimes use harsh chemicals possibly damaging the microwaving or leaving bad smells or dangerous chemicals in the microwave or scratching the surfaces. Thankfully we have some quick instructions that eliminate the need for harsh chemicals or possibly damaging scrubbing with pot scrubbers. Quick instructions for easy cleaning of your microwave Actually the first thing to consider is what to clean your microwave with; instead of expensive and fancy cleaners we recommend any of a number of simple kitchen ingredients to clean your microwave. These handy substances and inexpensive cooking supplies can easily help you clean your microwave on regular basis.
After the microwave stops wait about 5 minutes before opening the microwave to let it cool and most importantly let the steam soak into anything that is really stuck on. After waiting, be very careful when opening the microwave to ensure the steam does not burn you. After the steam rises out, cautiously remove the bowl with the mixture water wearing oven mitts to ensure you don’t burn your hands. Then ensuring the microwave isn’t too hot, gently wipe the inside of the microwave with a clean damp cloth but it may take a bit of elbow grease if it’s really stuck on. Generally anything stuck on the inside will come right off on the cloth and the inside of your microwave will look brand new. We do not recommend using pan scrapping pads as they can damage the microwave. For really baked on food, instead, repeat the process a second time perhaps boiling the water a little bit longer and letting the steam soak in more. We hope these tips have your microwave looking and cooking just like new and remember if you have any Appliance Repair needs, just give us at Appliance Force a call or book online and we’ll be happy to fix it. Here is a short do-it-yourself video showing tips and tricks on Microwave Cleaning.  How to stop your washing machine from stinking.A few simple tips to keep your washing machine fresh and working. One of the most common questions I get asked when I'm out on a call fixing an appliance is if I can take a quick look in their washing machine because it stinks a little. In fact this is one of the most common complaints about new front load washers. While these washers do an incredible job washing our clothes while using less detergent and water limiting our environmental footprint this issue can develop in some of these washers. Thankfully it is easy to solve with the tips below: 1. Use Only HE (High Efficiency) Detergent HE detergent is specially formulated to work with the low water washing machines and keeps the suds to a minimum. If HE detergent is not used in these modern, low water-use washers, residue or scum will accumulate in the outer drum and emit a foul odour. It is also important to only use at most the recommended amount of detergent and often less for smaller loads. 2. Run the "Tub Clean" Cycle Once a Month Use of either regular detergent or too much HE detergent will result in scum building up in your washer between the wash drum and tub. To remove this scum you need to regularly run a product like Affresh through your washer. If your washing machine does not have a self clean cycle use a hot water cycle with the highest water level setting. When running a Tub Clean cycle with Affresh, do not add any clothes or detergent. Just hot water and Affresh. 3. Reduce Detergent Use for Soft Water Softener Soft water will cause over-sudsing even when using HE detergent. To prevent scum buildup, the amount of detergent used in each wash needs to be reduced to prevent forming suds during the wash cycle. If the water is very soft, the detergent usage may need to be reduced even below recommended amounts. "But I like to see lots of suds in my washer because then I know my clothes are getting clean!" You have to start with the understanding that the tumble action of high-efficiency washers (i.e., front loaders) produce more suds than the agitator action in top loaders. Now most of people think, “Oooo, sudsy, that’s good!” No, not good. Suds do nothing to clean your clothes and are actually an undesirable by-product of the detergent’s chemical interaction with the water. General detergent guidelines for any front load or agitator-less top load washer with tub sizes 3.0 cu ft and larger is as follows (adjust as needed to eliminate undesirable sudsing):
4. Ensure Drain Hose is Installed Properly If the washers rain hose is not installed properly, the unit will not drain properly. Additionally, if the washer drain hose is pushed so far down the drain pipe that it's submerged in the standing water in the pipe, it will do two things:
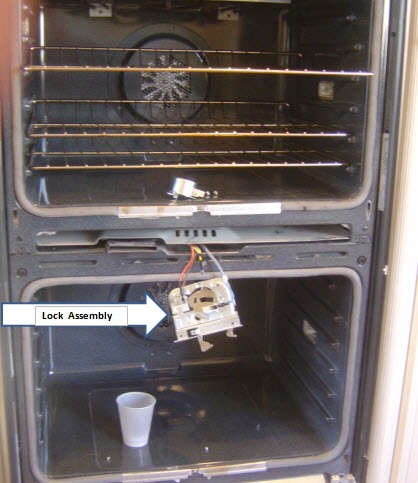
Never extend the drain hose more than 4 inches beyond the end of the elbow, and drain hoses should never be inserted more than 6 inches into drain. 5. Keep Washer Door Open or Lid Raised when Machine is Not in Use This is is probably the most important one. After a cycle, small amounts of water are left in the machine. When finished with the unit for the day, dry the gasket (on a front loader) and leave the door open for a couple hours to allow the moisture to evaporate and dry out. On top loaders, just leave the lid raised. Periodically, check the door gasket on a front load washer for mildew buildup. this can cause an odor but can be easily solved with a simple environmentally friendly cleaner like Simple Green. Spray the simple green on a cloth to wipe out the gasket. If you're a bleach fan, mix 3/4 cup bleach with a gallon of hot water. Use this bleach mixture and a cloth to wipe out the gasket. (Do not use bleach alone. Undiluted bleach will damage the gasket.) If the mildew cannot be removed, the gasket will have to be replaced, Just call or book online your appliance repair team at Appliance Force and we can replace that gasket for you just remember to have the brand and model number of the unit handy. 6. Clean the Drain Pump Filter Regularly Most front load washers have some type of "coin catcher" or screen for catching debris that you don't want going into your pump. This drain pump filter should be cleaned about once a month to prevent odors. This filter is generally located behind a small door at the bottom or side of the washer. Be prepared for a small amount of water left in the tub to come out when the filter is unscrewed. Some manufacturers models do not have customer serviceable filters and require a professional technician to remove and clean the filter. Check the manual and if this is the case we'd be happy to come and help. Hopefully these tips help your washer and clothes be fresh and clean every time. Feel free to email me with any other ideas or questions you may have for our blog at [email protected] And remember to Call Appliance force or book online for all your Calgary appliance repair needs. Here is a video on some great washer tips. However we do recommend using a less hash chemical then bleach when cleaning the gasket. We've found simple green to be one of the best. Running Self Clean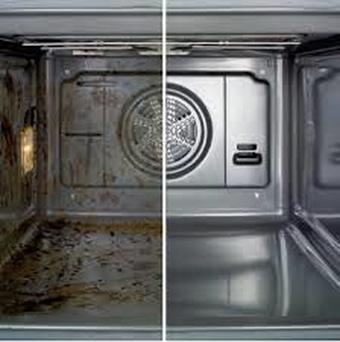 One of the most common questions I get while we are fixing an appliance is, is it safe to self clean my oven. Here is an article I wrote a while ago on self cleaning your oven. For some reason, people always wait until the last few days before the holidays to run the self-clean feature on their oven. The problem is not "why" you run the self-clean, but when. During self-clean, the temperatures inside the oven cell can exceed 900 F. This is very stressful on the oven's sensor, door lock assembly, and electronic control board. If anything is on the verge of breaking, it will usually happen during the self-clean cycle. This means that if you think you're going to run the self-clean cycle in your oven, don't wait until a few days before the holidays, when you'll need it to cook that big turkey for a house full of guests, do it now! Then, if something does break in the oven, you'll have time to get it repaired and won't end up in a last-minute panic trying to get your oven fixed. Door Locks
by the oven's electronic control board (the control panel with the digital display). If this motor isn't used on a regular basis, the accumulated grease that collects in the motor during normal use will coagulate and harden during self-clean and bind the motor so that it can't unlock the door. Temperature Sensors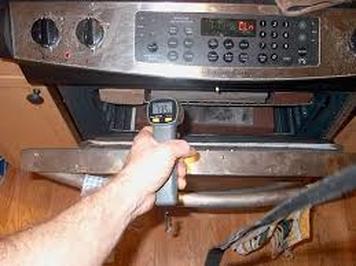 The oven temperature sensor is also stressed during self-clean and is the second-most common thing to fail during or after running the self-clean cycle. Less commonly, yet still prevalent, the oven's electronic control board can fail due the extra heat it receives during self-clean. So, if you run the self-clean in your oven and you have problems call us for fast and efficient appliance repair. In order to help us fix your appliance in the most efficient manner we need the model number. This picture shows you the most common places to look on your oven or range to find the model number. Appliance Force - Calgary Appliance Repair 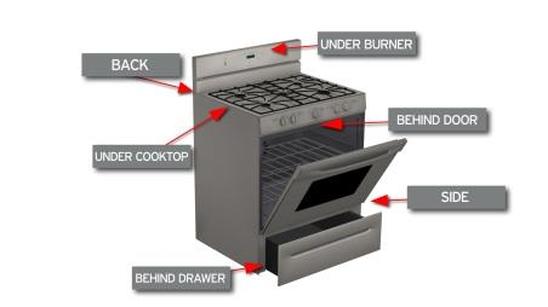 |
AuthorAppliance Force Calgary ArchivesCategories
All
|
 RSS Feed